

How to Make Crispy Bread Crumbs?

Making Crispy Bread Crumbs at home is easier than it seems, but texture depends on small details. Fresh bread often produces soft, uneven crumbs. Slightly stale bread works better because it contains less moisture. I have tested sandwich bread, sourdough, and dinner rolls, and each creates a different flavor and crunch.

Dry the bread gently before grinding it. A low oven helps remove moisture without burning the edges. Tear the slices into small pieces, then pulse them in a food processor. Avoid blending continuously. That creates powder instead of crisp, useful crumbs. For a rougher texture, crush the dried pieces by hand. The results look less uniform, but they often brown more beautifully.

Watch the color carefully. Crumbs can change from golden to bitter within minutes. Spread them in a thin layer on a baking sheet, and stir once during baking. A little olive oil adds richness, while salt, garlic, dried herbs, or grated cheese can build more character. However, strong seasonings may hide the bread’s natural flavor.

My first batches were too dark and strangely chewy. The problem was simple: I stored them before they cooled completely. Steam softened the crumbs again. Let them cool fully, then keep them in an airtight container. This guide explains how to make Crispy Bread Crumbs with practical methods, realistic timing, and room for adjustment. Your oven may behave differently. Trust the texture, not just the clock.
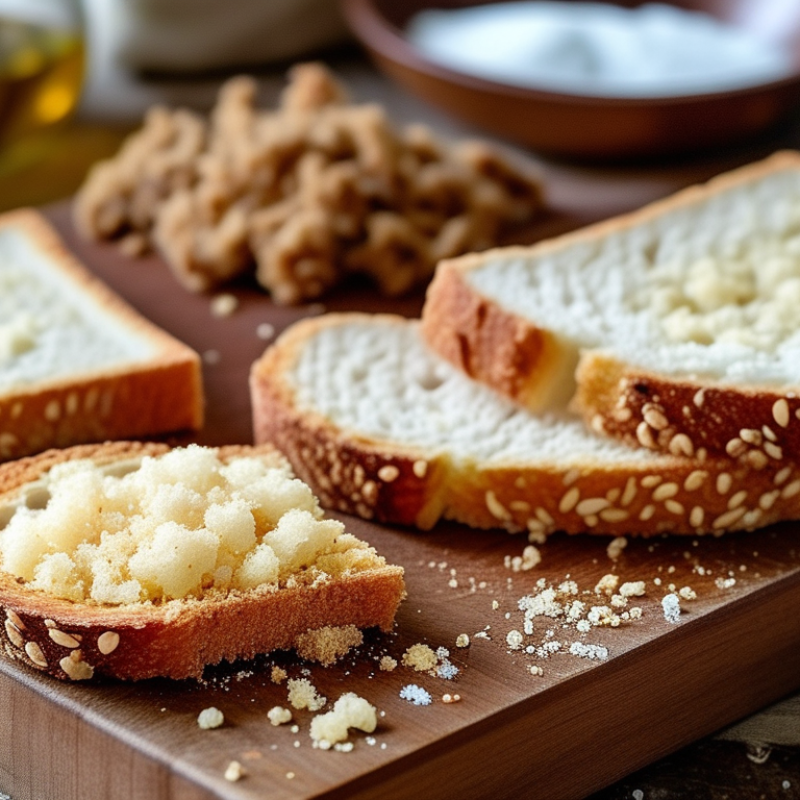
How to Make Crispy Bread Crumbs?

Choosing and Preparing the Bread for Crumbs

How to Make Crispy Bread Crumbs?

Choosing the right bread controls the final crunch. I prefer day-old white, whole-wheat, or sourdough bread with a firm crumb. Very fresh bread contains more moisture and may produce soft, clumping crumbs. USDA FoodData Central lists many ordinary breads at roughly 35–40 grams of water per 100 grams. That moisture must leave before grinding. Avoid mold, heavy fillings, and very oily slices. Sweet enriched bread can brown too quickly. Seeded bread adds flavor, but it creates uneven crumbs.

Cut the bread into 1–2 centimeter cubes. Smaller pieces dry more evenly. Spread them in one layer on a plain baking tray. Dry them at 120°C for 20–30 minutes, turning once. The cubes should feel hard, not dark. Let them cool completely. Warm bread still releases steam. That shortcut failed in my kitchen. The crumbs became sticky inside.

Pulse the dried cubes in short bursts. Stop when you see coarse, sandy pieces. A sieve can remove oversized fragments. For extra crispness, return the crumbs to the oven for five minutes. WRAP reports that UK households waste about 20 million slices of bread daily, so this method gives stale bread a practical second use. Store the finished crumbs in an airtight container. Check for softness after one day. I sometimes dry them too aggressively, and the toasted flavor becomes bitter. That balance needs attention.

Drying the Bread Until It Becomes Firm

How to Make Crispy Bread Crumbs?

Drying the Bread Until It Becomes Firm

Crispy bread crumbs begin with bread that has lost most of its moisture. Slightly stale slices work well because they crumble more easily. Fresh bread can still work, but it needs extra drying time. I usually tear the bread into small pieces before drying it. Smaller pieces expose more surface area to warm air.

Spread the pieces in one layer on a dry baking tray. Keep space between them. A low oven, around 120°C, dries the bread gently without burning its edges. Stir the pieces every 10 minutes for even drying. The bread should feel firm, light, and dry in the center. Do not judge it only by color.

Let the dried pieces cool completely before grinding them. Warm bread can release hidden steam and create soft crumbs. A food processor makes fine crumbs, while a rolling pin produces a rougher texture. I once removed the bread too early, and the crumbs softened overnight. That mistake taught me to break one piece open before grinding. If the center feels flexible, keep drying it. Bread with mold or an unusual smell should be discarded, not rescued. Store the finished crumbs in a clean, airtight container after they cool.

How to Make Crispy Bread Crumbs? Drying the Bread Until It Becomes Firm

Bread becomes firmer and crispier as its moisture content decreases. Generic white bread contains about 37.5 g of water per 100 g, while dried bread crumbs contain about 5.3 g. Drying the bread thoroughly before processing helps produce a crisp texture and reduces soft clumping.

Data source: USDA FoodData Central generic food entries for white bread and plain dried bread crumbs. Values represent water content per 100 g edible portion.

Breaking or Processing the Bread into Crumbs

Crispy breadcrumbs begin with the right bread. Slightly stale bread works best because it contains less moisture. I usually tear it into small pieces before processing. Smaller pieces create a more even crumb. Fresh bread can work, but it needs extra drying time.

Spread the torn bread across a baking sheet. Dry it at a low temperature until firm, not deeply brown. Let the pieces cool completely. Then pulse them in a food processor. Short pulses prevent the bread from turning into powder. For a rougher texture, crush the dried pieces inside a clean bag with a rolling pin. I once processed warm bread too quickly. It became sticky and uneven. That mistake taught me to wait.

Tips: Use a serrated knife for difficult crusts. Remove any moldy bread immediately. Sift the crumbs if you need a fine coating. Add dried herbs only after processing, so their color stays clearer. For extra crispness, return the crumbs to the oven for a few minutes. Watch them closely. Thin crumbs can darken suddenly. Store completely cooled crumbs in a dry, sealed container. Condensation is the quiet problem.

Seasoning and Toasting the Crumbs for Crispness

How to Make Crispy Bread Crumbs?

Crispy breadcrumbs begin with dry bread, but seasoning controls their final texture. I usually tear day-old bread into small pieces before pulsing it into uneven crumbs. Fresh bread can work, but it needs more oven time and closer attention. Spread the crumbs across a shallow baking tray. Avoid a thick pile. For every cup of crumbs, mix in one tablespoon of olive oil, a pinch of salt, and a little black pepper. Dried herbs, grated hard cheese, or smoked paprika can add depth. Keep it balanced. Too much seasoning can hide the toasted flavor and make the crumbs taste harsh.

Heat the oven to 325°F (160°C), then toast the seasoned crumbs for 12 to 18 minutes. Stir them after eight minutes so the edges do not brown too quickly. Small crumbs may finish early, while larger pieces remain pale. I sometimes remove the tray in stages for this reason. It feels inefficient, but it prevents burnt bits. Garlic powder is safer than fresh garlic during longer baking, since fresh pieces can darken and turn bitter. The crumbs should feel dry and lightly crisp, not deeply brown. Let them cool completely on the tray before storing them in an airtight container. They become firmer as they cool. I once judged them too soon and nearly over-toasted the second batch. Salt adjustments are easier after cooling, so taste a small spoonful before serving.

Cooling, Storing, and Using Crispy Bread Crumbs

After toasting, spread the bread crumbs across a cool metal tray. Leave them uncovered for 20 to 30 minutes. This releases trapped steam and protects their crisp texture. Warm crumbs sealed too early can become soft overnight. I sometimes stir them twice, because the center may remain slightly moist. That small step is easy to miss.

USDA FoodKeeper guidance lists dry bread crumbs as a shelf-stable pantry food, but storage dates depend on preparation and packaging. For homemade crumbs, use a clean, airtight container and keep it away from heat, sunlight, and kitchen moisture. Label the date clearly. Use them within two weeks for the best flavor, or freeze them for up to three months. Discard crumbs showing mold, unusual odors, or damp clumps. Do not taste questionable crumbs.

Crispy crumbs add texture to baked vegetables, pasta dishes, fish, and stuffed mushrooms. Toast a measured portion with herbs just before serving for stronger aroma. They also help use bread that might otherwise become waste. WRAP reported that UK households wasted approximately 6.6 million tonnes of food in 2022, showing why practical reuse still matters. However, very dry bread can produce hard, uneven pieces. Pulse in short bursts, then sift the crumbs. I prefer a mixed texture. Fine crumbs coat evenly, while larger pieces create a louder crunch.

How to Make Crispy Bread Crumbs? - Cooling, Storing, and Using Crispy Bread Crumbs

Stage or Use Recommended Conditions Typical Time Expected Result Important Tips
Choose the Bread Use day-old bread with reduced moisture; white, whole-wheat, sourdough, and multigrain bread can all work. Use immediately or after 1 day Drier bread produces a lighter, crispier crumb. Remove visible mold or bread with an unpleasant odor; do not use it.
Dry the Bread Cut into cubes or slices and dry in an oven at about 120°C–150°C (250°F–300°F). 15–30 minutes The bread should feel dry and lightly crisp without becoming deeply brown. Turn the pieces once or twice for more even drying.
Grind or Crush Process the dried bread in short pulses or crush it in a sealed bag. 1–3 minutes Fine crumbs suit coatings; coarse crumbs add a stronger crunchy texture. Process in batches to prevent uneven particle sizes.
Toast for Extra Crispness Spread crumbs in a thin, even layer and bake at about 160°C–180°C (325°F–350°F). 5–10 minutes Golden, dry, and noticeably crisp crumbs. Stir frequently because small crumbs can burn quickly.
Cool Completely Transfer the crumbs to a cool tray and leave them uncovered at room temperature. 20–40 minutes Heat and surface steam dissipate before storage. Never seal warm crumbs, as trapped condensation can make them soft.
Short-Term Storage Place fully cooled crumbs in an airtight container in a cool, dry cupboard. Up to 1–2 weeks Good texture and flavor when kept away from moisture. Label the container with the preparation date.
Long-Term Storage Freeze cooled crumbs in a moisture-resistant, airtight container or freezer bag. About 1–3 months Flavor and texture remain well preserved when protected from freezer moisture. Use small portions to avoid repeated thawing and refreezing.
Re-Crisping Spread softened crumbs on a tray and heat at about 150°C–160°C (300°F–325°F). 5–8 minutes Moisture is reduced and the crunchy texture is restored. Cool again before returning the crumbs to storage.
Coating Fried or Baked Foods Use dry crumbs on vegetables, poultry, seafood, tofu, or cheese before baking or frying. Cook according to the main recipe Creates a crisp outer coating and helps add texture. Season the crumbs before coating for more even flavor.
Topping Casseroles and Pasta Combine crumbs with a small amount of oil or melted butter and scatter over the dish. Usually 10–20 minutes of baking A browned, crunchy topping contrasts with soft foods. Watch closely near the end of baking to prevent over-browning.
Freshness Check Inspect the crumbs before use for moisture, mold, unusual odors, or an off flavor. Every time before use Safe, dry crumbs should smell clean and feel crisp. Discard crumbs showing any sign of spoilage.
This website uses cookies to ensure you get the best experience on our website